Collaboration
CloudStudio provides functionality for collaborative work by allowing you to add members to projects.
To collaborate, you first need to create a project.
For instructions on creating a project, please refer to this guide.
The member who creates the project will have master permissions and can share the workspace and modify
the project with invited members.
Adding and Removing Members for Collaboration
Adding Members

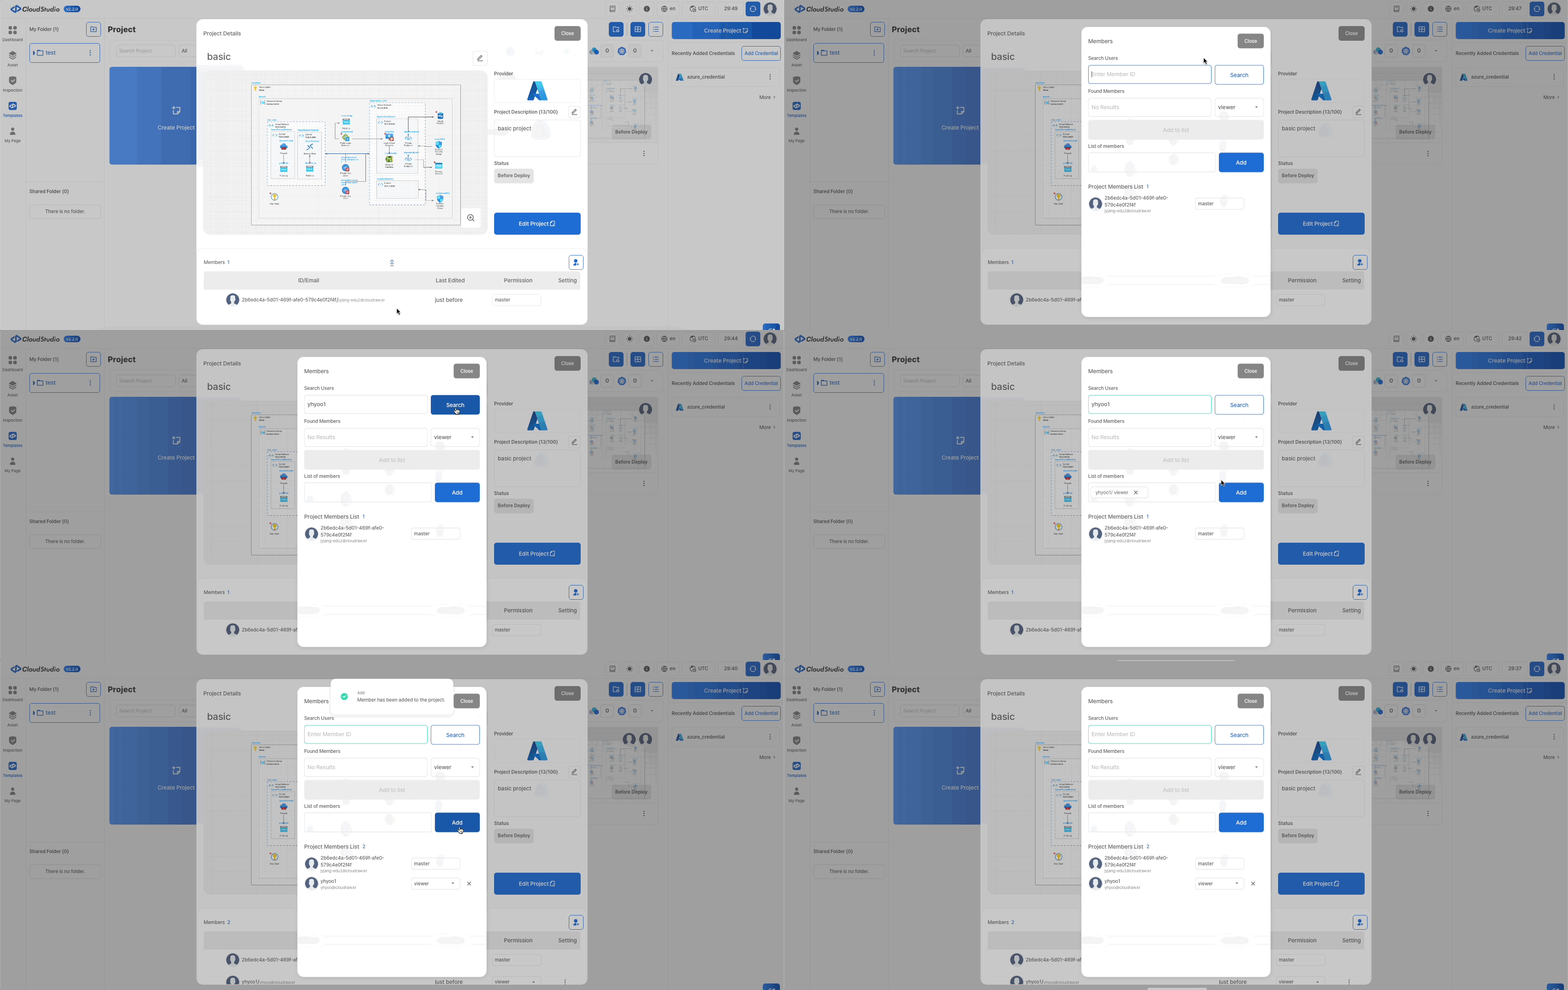
- Click on the project you want to collaborate on.
- Click the user icon.
- When the project members modal appears, search for the user ID of the member you want to add to the project.
- After finding the user, assign permissions and click the
Add to listbutton. (You can add multiple members.) - Once you have added all desired members, click the
Addbutton. - Click
Close. (Once members are added, they are automatically invited to the project. An invitation email will be sent to the invited members.)
Removing Members

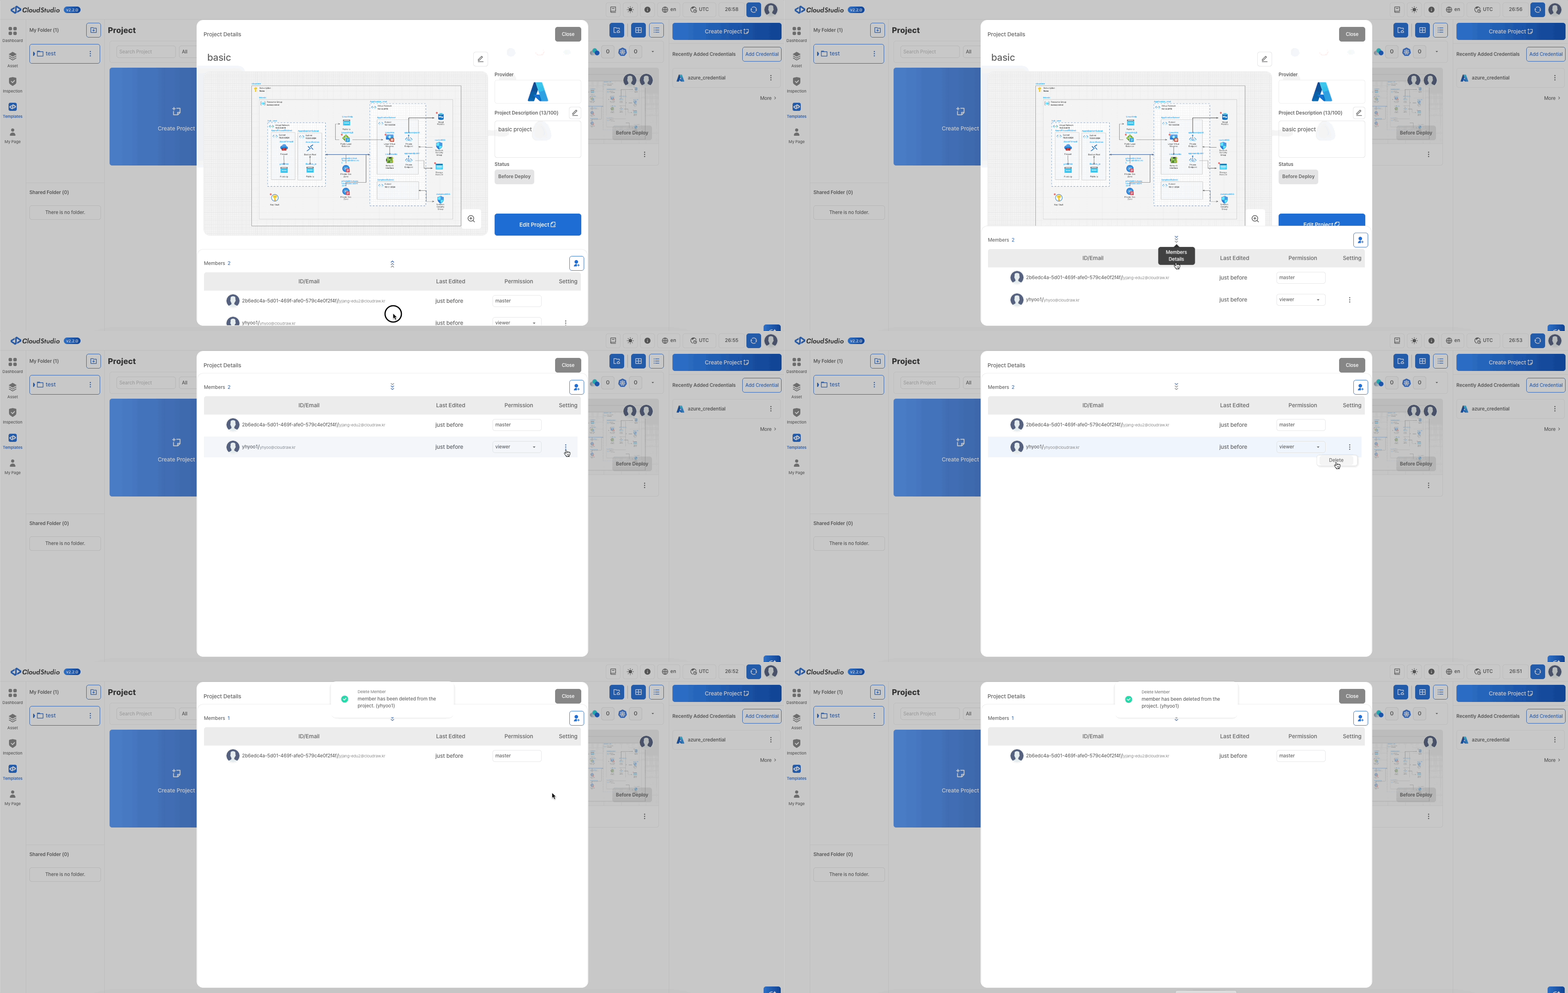
- Click on the
projectwhere you want to collaborate. - Click the
arrowto view member details. - Click the
more options iconin the settings. - Click
Delete.
Project Permissions
| Project Permissions | Description |
|---|---|
| master | As the creator of the project, you have full access to perform all tasks, including reading, editing, deleting, importing, deploying, and inviting members to share the project. |
| admin | You can read, edit, import, and deploy the project, but you are not allowed to delete it. |
| editor | You can read and edit the project, but all other tasks are not allowed. |
| viewer | Only the project reading task is allowed. |
Collaborating
- When the master adds members to the project, an invitation email (to the user’s registered email) will be sent, and the
shared projectwill appear in the Shared Folders section within CloudStudio. - To collaborate, click on the shared project and then click the
Edit Projectbutton. - You can now freely edit the canvas with your team members.
Collaborating
When the master adds members to the project, an invitation email (to the user’s registered email) will be sent, and the shared project will appear in the Shared Folders section within CloudStudio. To collaborate, click on the shared project and then click the Edit Project button. You can now freely edit the canvas with your team members.
Members without control permissions on the canvas can send a Request Control to the current controller. If the request is accepted, they will gain control of the canvas.
However, the master can take control immediately without needing the other party's consent when requesting control.
Canvas control permissions are automatically transferred to the remaining users when the master leaves the project,
following the order of master → admin → editor (viewers are excluded as they do not have editing rights).
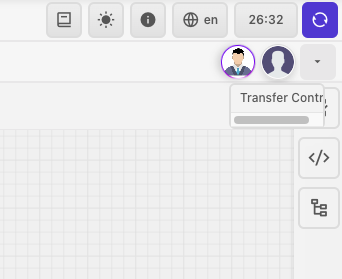
To transfer canvas control, follow the steps below:
click on the profile of the member to whom you want to transfer control.
Click Transfer Control.
