Console Inspection
Console Inspection Permission Inquiry
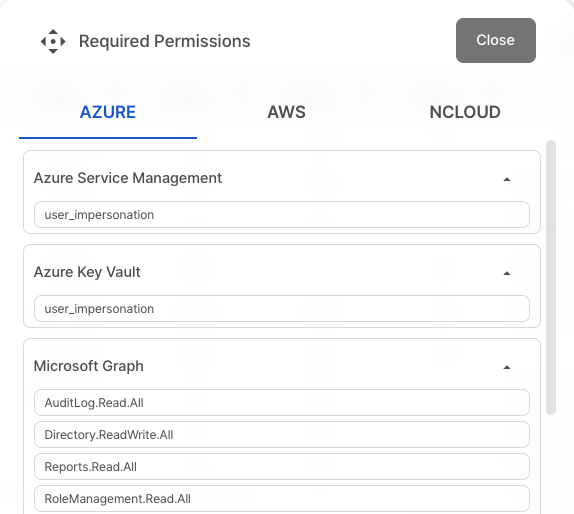
To inquire about console inspection permissions, click the ⓘ Button.

Console Inspection
How to Execute
- Click the
Inspection > Inspection Management > Console Inspectiontab to access console inspection. - Select the
group you want to inspectfrom the group list.
Console inspections are performed based on the selected group. Please create a group first before starting console inspections.
How to Create a Group
- Click the
Console Inspection tab.

Click the
Inspection Button.
Enter an inspection title (to specify what the inspection is about), then click the
Start Inspection Button. The inspection title can be viewed and edited in the inspection details.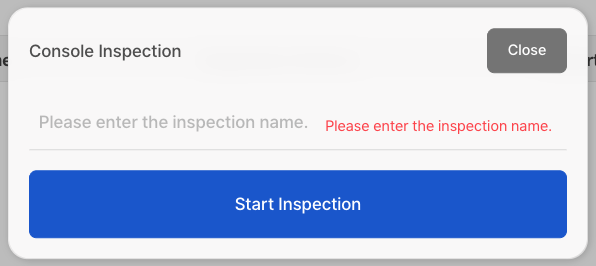
Inspection Result Details
You can view detailed results for each column in the table. Click on the column you want to review.
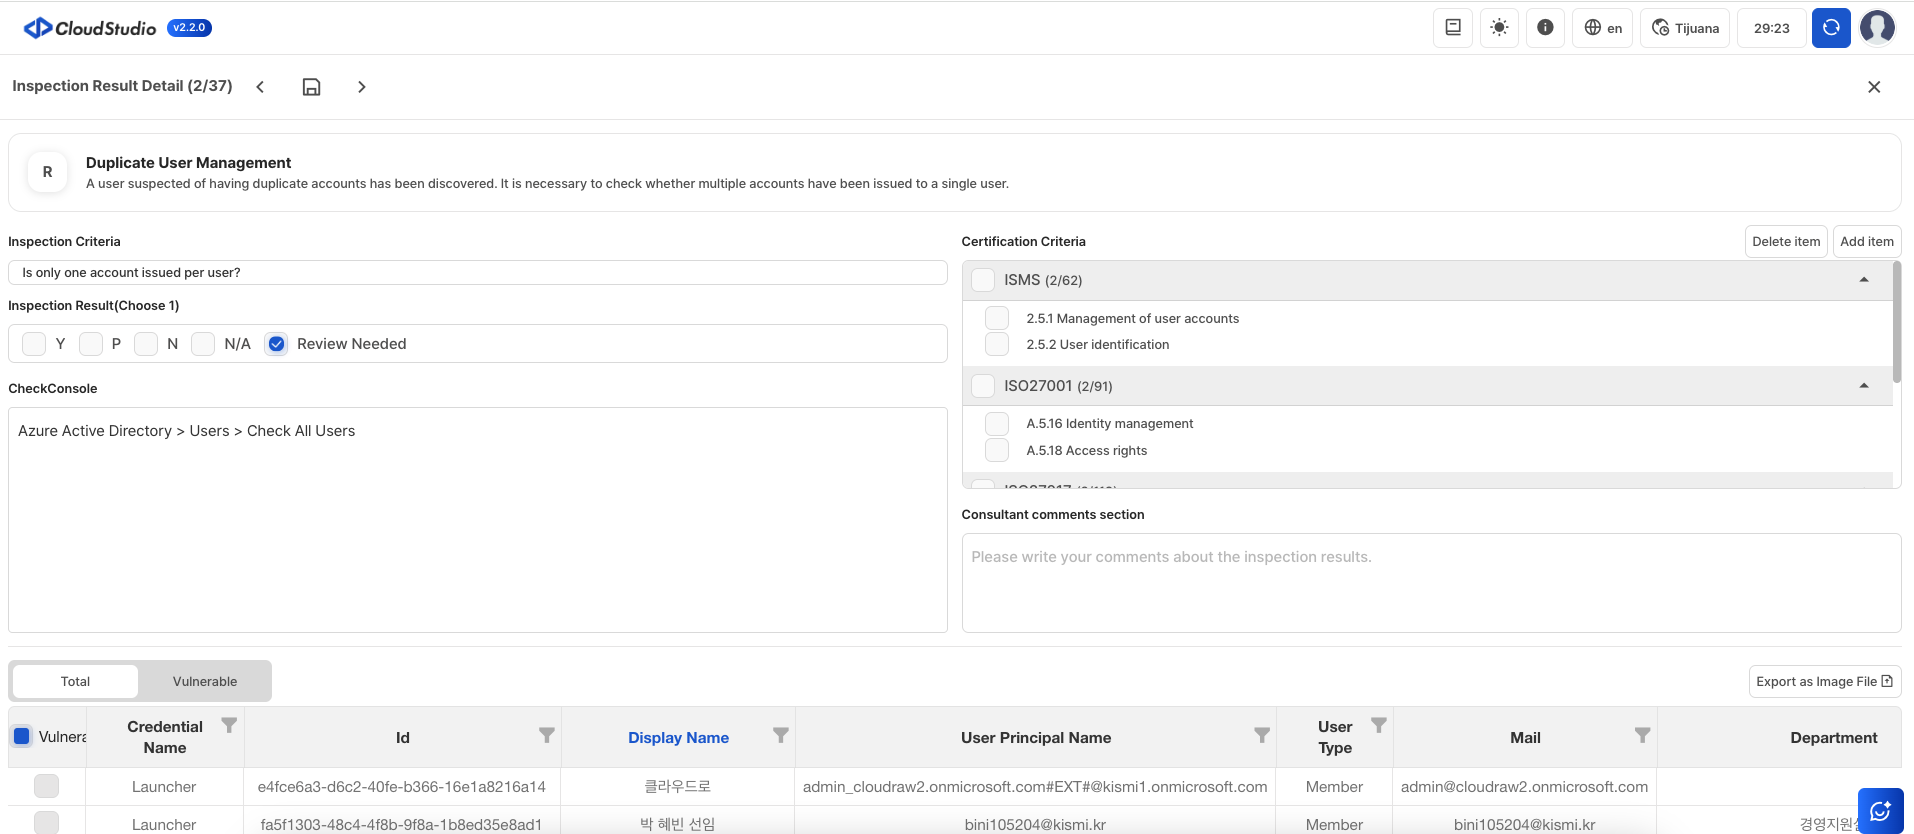
Console Inspection
Displays the inspection method (e.g., if the result is vulnerable, it specifies how to resolve the issue).
Inspection Results
In the inspection results, Y means compliant, N means vulnerable, N/A means not inspectable, and P means average.

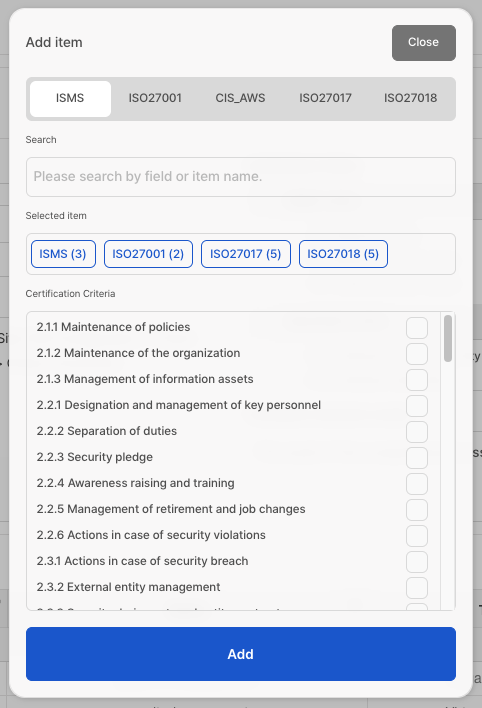
Certification Criteria
You can manage the items corresponding to each certification criterion. For
example, in the image below, the certification criteria are (ISMS, ISO). You can
check the desired items using the checkboxes and add them.
Consultant Opinion Field
A field where consultants can write their opinions regarding the inspection results.
Detailed Results Table
In the detailed results table, you can view all assets. If a vulnerable item belongs to the overall items, you can move it to the vulnerable tab by clicking the checkbox.
Export Detailed Results as an Image File
Click the "Export as Image File Button" to save the results as a PNG file.

If you navigate away from the page without clicking the Save Changes button after editing the details, the changes will not be applied.
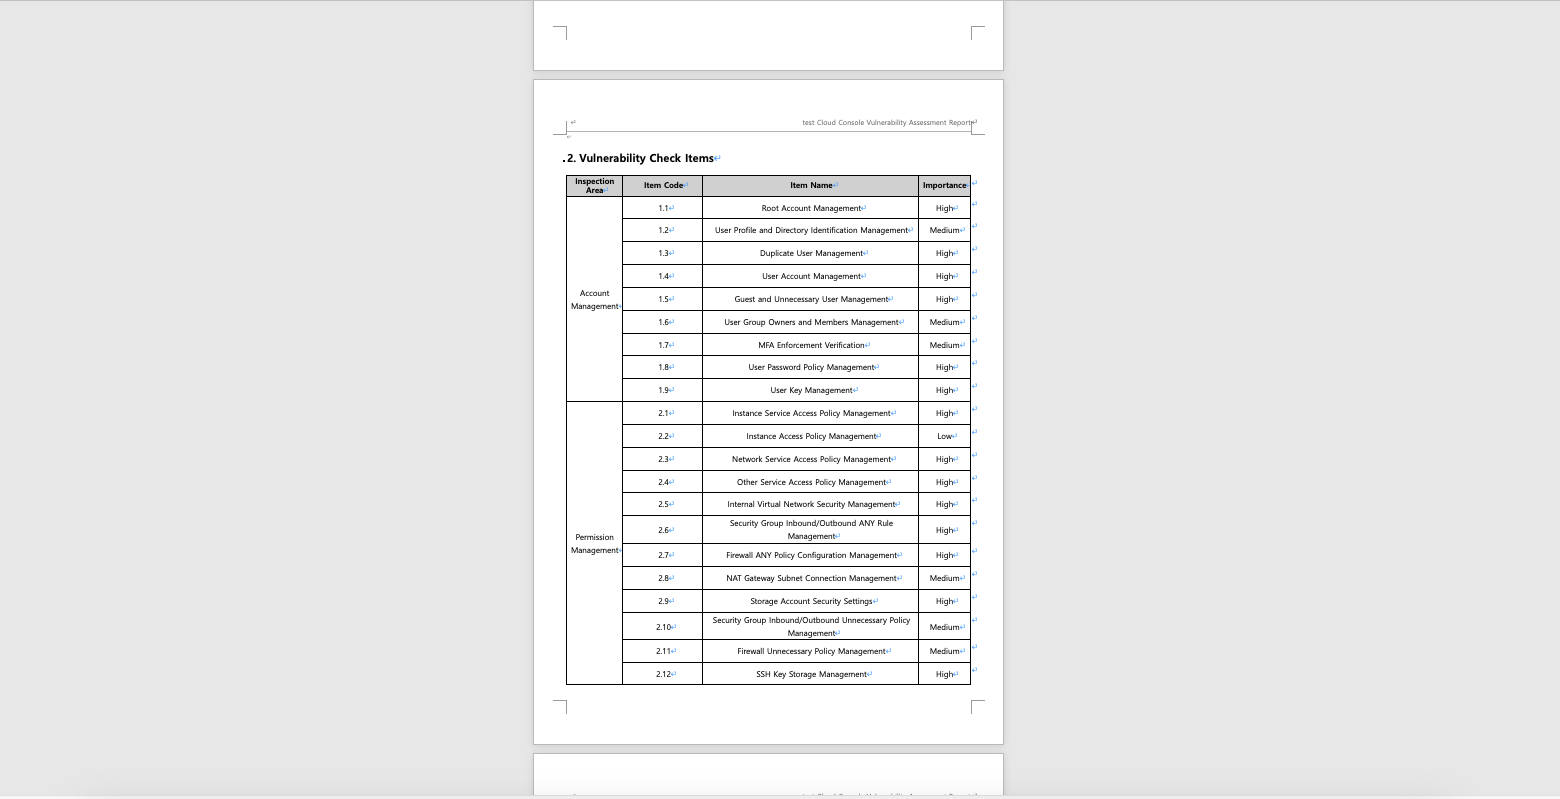
Report Generation
Once the inspection is complete, you can view the results in a table. The table includes six columns: Scope, Item Name, Inspection Criteria, Priority, Inspection Result, and Inspection Result Details.
For more detailed information about Inspection Criteria refer to here.
CS Checker provides two types of reports: Excel and Word.
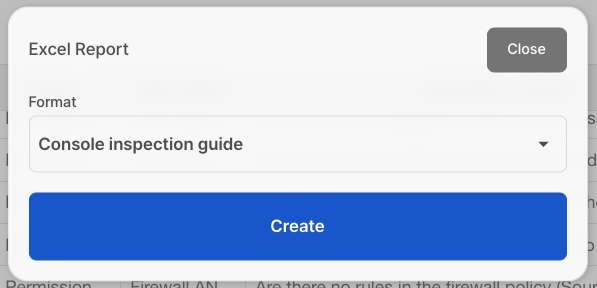
Excel Report
To download the Excel file, click the
Excel Report Button.
After selecting Compliance, click the Generate button.
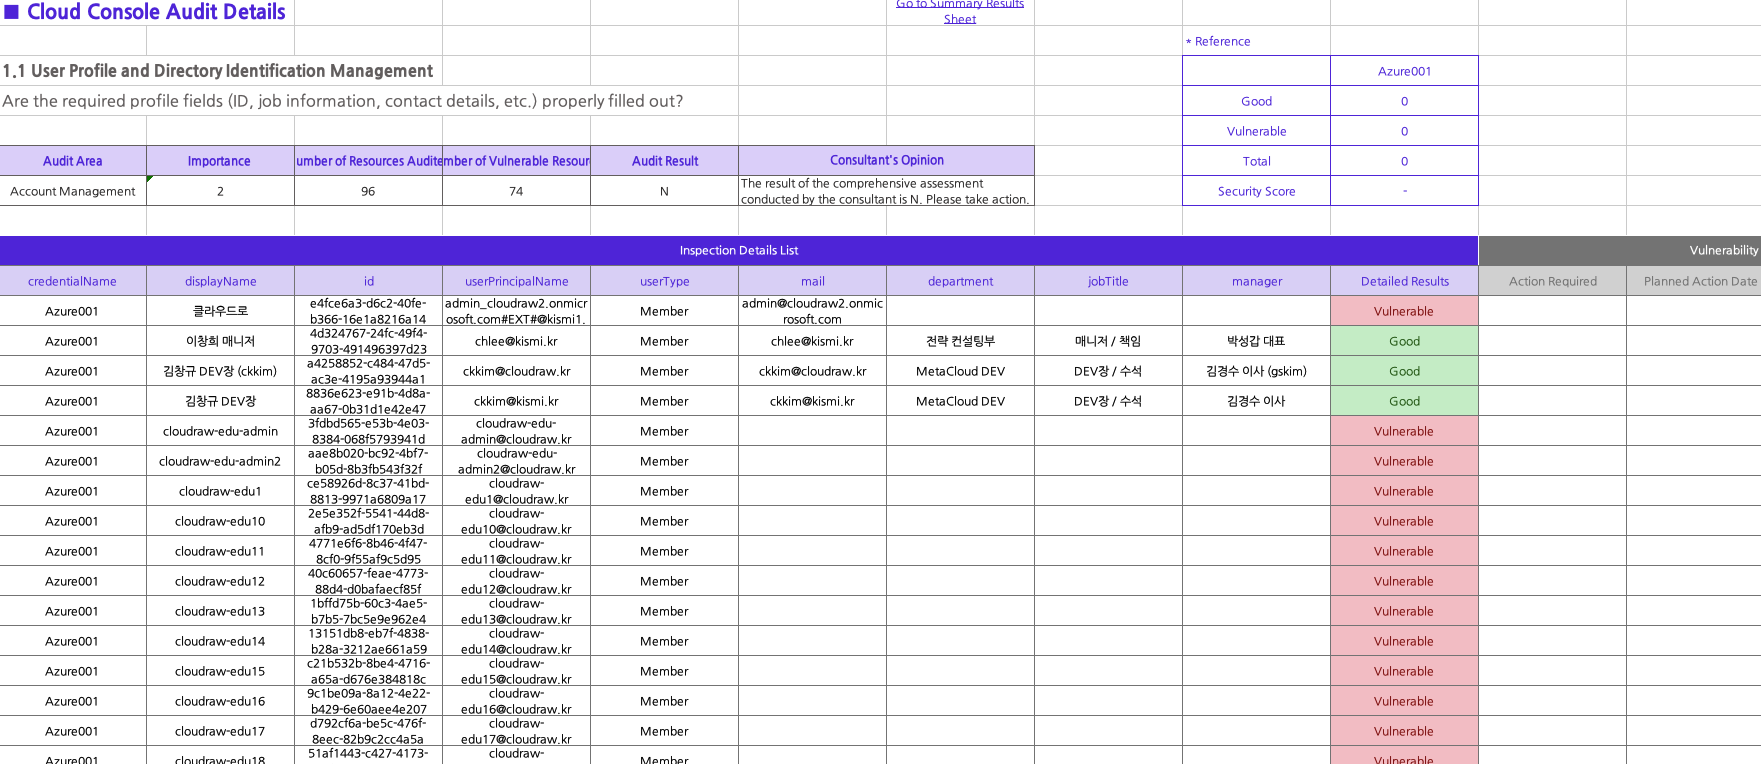
Open the Excel file to check the inspection details.
Word Report
To download the Word file, click the
Word Report Button.
When the popup opens, enter the required information.
2-1. Select Compliance
2-2. Enter the Report Title
2-3. Choose the Inspection Schedule
2-4. Enter the Inspector
2-5. Click the Create button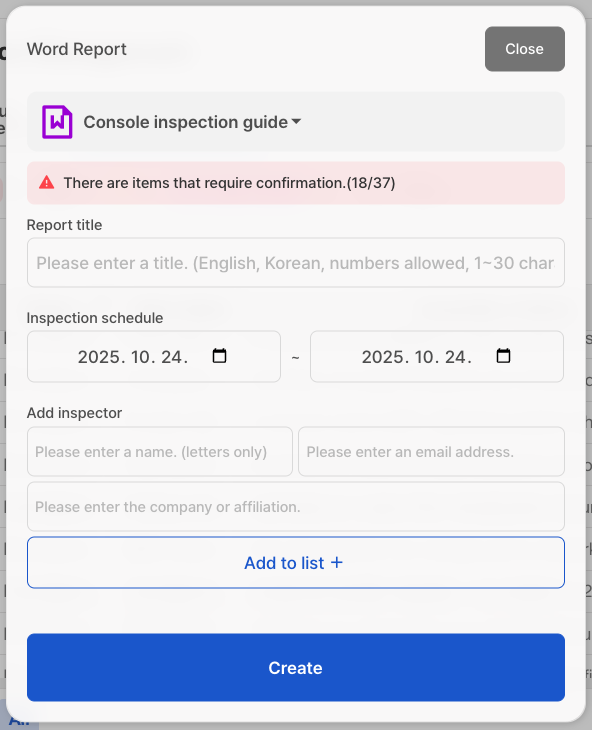
Open the Word file to review the inspection details.
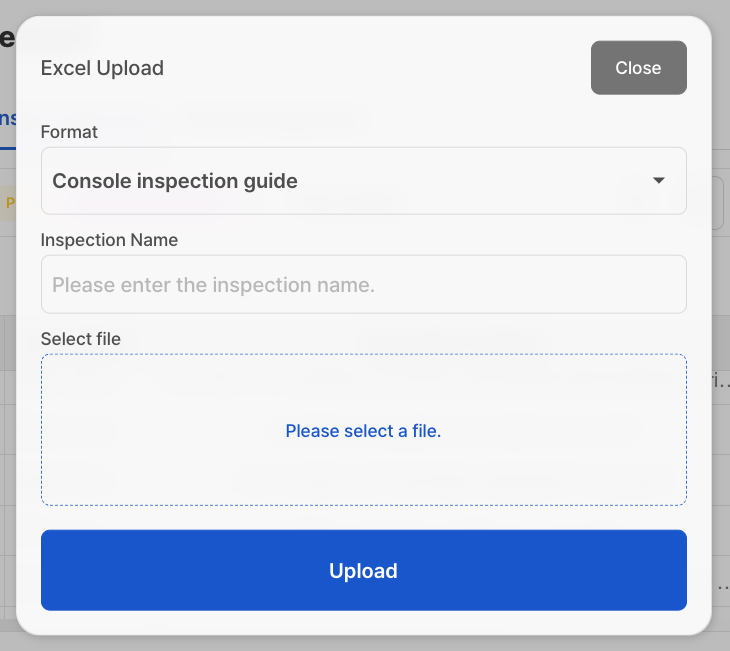
Excel Upload
If you upload the modified Excel report to CS Checker, the changes will be applied.
Inspection History Check
Click the
Inspection History Button.
In the inspection history, you can check the
Inspection Title, Inspection Execution Date & Time.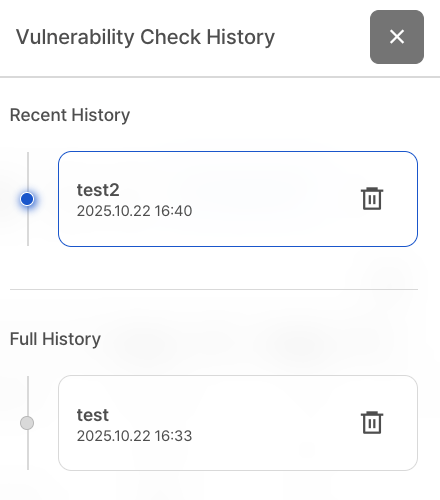
You can click on the history you want to navigate to and review the inspection details. You can also delete an inspection by clicking the button.